Do you want to start collecting and trading Upper Deck Overwatch League cards, but you’re not sure where to begin? Well it’s time to get started! This post will cover the basics of the Upper Deck e-Pack site (www.UpperDeckEpack.com) so you’ll be ready to get started. You can also view the TUTORIALS page on the site, but this is a more in-depth explanation with images.
First things first: You will want to create an account on Upper Deck e-Pack®. This way you’ll be able to open card packs and start collecting. It’s pretty much the standard “create a username, put in your e-mail, make sure you’re old enough” fare that most sites ask for. You’ll need to verify the account via an e-mail, so check for that.
Once you get your account started, you’ll be able to buy, store, trade, and collect all in the same place. While there are some items in packs that exist only digitally on the site, there are many items that have a physical counterpart. These physical cards can be shipped home, or transferred to your COMC (Check Out My Cards) account if you wish to sell them or have them graded. You’ll know which cards have physical counterparts by the blue transfer icon below the card image that looks like a rectangle with an arrow moving up.
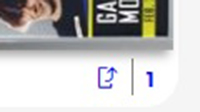
The “Transfer” icon indicates a physical item on Upper Deck e-Pack®
Now, before we get too far, it’s important to understand there are some cool things you can do on Upper Deck e-Pack® once you start collecting. The main one would be achievements, where, upon completion of certain sets, you can unlock amazing achievement rewards. More on that to come.
At the top of the site you’ll see the four words “Shop,” “Collect,” “Trade,” and “Connect.” The SHOP is where you can browse through the many types of cards available for purchase. There are a wide variety of products to check out including Overwatch League. Let’s go over the highlights from each of the tabs, starting with the “Collect” tab.
Collect

Upper Deck e-Pack® Collect Tab
The “Collect” tab can be a bit overwhelming, but hopefully we can clarify it for you. Firstly, there’s the “My Collection” section where you can go to view all of your cards. You’re also able to find your own wish list, where you can let other collectors and traders know which cards you’re looking for. This can come in handy if you’re going to be trading to get certain cards or achievements (which we will cover next). You can also find product checklists, and show your transferable (physical) items.
Next over you’ll see “My Packs” which is where you’ll open any packs you’ve purchased, and you can also find an easy link to your daily free pack. It’ll be hard to forget collecting your free pack if you check the site daily, as you’ll have a little yellow exclamation point reminding you. You’ll also see “Pack Wars,” where you can challenge either a computer opponent or another collector in a pack vs pack opening battle. Once you’ve got your packs opened, it’s time to get into achievements.
Achievements
Achievements are one of the most fun parts of collecting cards on Upper Deck e-Pack®. Most sets of cards available have a related set of achievements. Completing these achievements means you can earn some awesome items: an avatar to use on the site, a rare card variant, an autographed card, or even some amazing memorabilia. When you’re hovering over “Collect” and see the “Achievements” topic, you’ll see “View Achievements,” “Badges,” and “Quest Challenges.” Before viewing the list of achievements, know that there are quite a few.
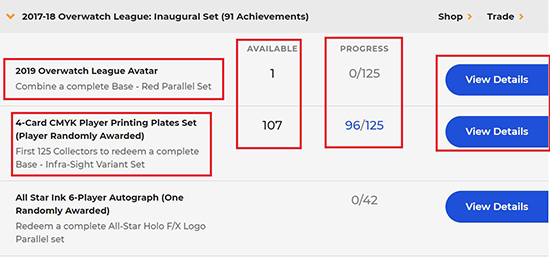
Upper Deck Overwatch e-Pack® Achievement List and Details Spell Out What to Chase
Just as there are many card types on Upper Deck, some packs have many achievements as well. Each of the different card series will be in their own dropdown tab, but the top is where you’re able to see your most recent progress towards various achievements. You can see what the reward for completing the achievement is, how many of those rewards are available, and how many cards you’ve collected out of how many total cards needed for the achievement. You can also click the “View Details” tab to see what the potential reward looks like (though the exact item may not be depicted). For some of the previous sets, there may not be many achievements still available to be redeemed, but you can look through the list and see which you might want to go for.
Product Checklists
When you click on “Product Checklists” in the “Collect” tab, it will first take you to a page where the sets are divided into categories. Click which category you’re looking for, and it will take you to the sets that are included in it. For the example below, you’ll see part of the checklist for the 2017-18 Overwatch League: Inaugural Set cards. For that, you will click on “Esports” then scroll down to find the product you are looking for. Now you can see all of the different segments of that set. When you click on a specific segment, you will see the cards that you own listed in green with a check in the box next to it.
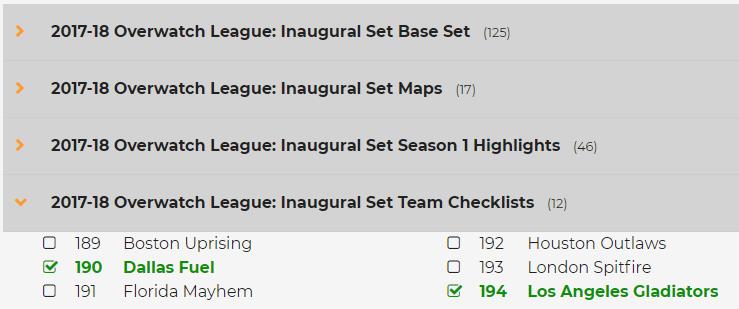
2017-18 Overwatch League: Inaugural Season set checklist
This is perfect for those completionists out there who wish to collect all the cards in a certain set and need to know which you’ve got left.
Redeemed Cards
As you’re looking to complete achievements, you’ll need to know that cards can only be redeemed for an achievement once. If a card has already been used, you’ll see a big “R” on a yellow/orange square, meaning it has been redeemed. If you’re going for achievements, you’ll want to make sure the items you get do not have this R. However, this is a good way to keep track of which cards in your collection have already been used for one achievement if you have multiples. If it’s a card with a physical copy, you can also feel safe sending it home knowing it’s already been used for an achievement.

Upper Deck e-Pack® Redeemed Items Example
Combining Cards
Another part of collecting cards that can be overlooked is the ability to combine base cards that you have multiples of. While most base player and map cards are digital only, you can combine multiples that you can then redeem for physical items. By going into your collection, you can choose to filter your cards by “Can Be Combined,” which is in the Attributes section. Once combined, the card will have a different color foil than the silver base: green for uncommon (only in the 2018-17 Inaugural Season set), blue for rare and purple for epic. You can also choose to combine cards individually, or accumulate a lot and use the Mass Combine option! As a note, there’s a shredding noise and animation that happens when combining cards, which can be toggled on or off. For that, you’ll click on your icon in the top right corner, click on “Settings,” then “Other Settings,” and then scrolling down to “Experience and Alerts.”
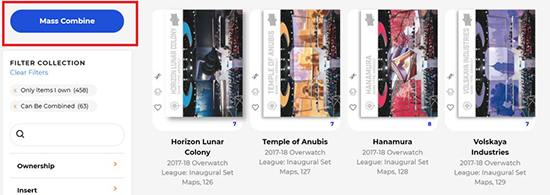
The Mass Combine Option on Upper Deck e-Pack
Hopefully this information has been helpful and is enough to get you started. You can head to the Upper Deck e-Pack Store and start your own collection! Also, keep an eye on the blog for the next post on getting into trading Overwatch cards on e-Pack®. If you have any questions, or other topics you’d like to be covered, leave a comment and we’ll do our best to get you the information you need!


